Nessie thinks he might like to make lasagne today. Lasagne is a delicious baked pasta dish, which you can make to impress all of your friends and also your mum.
It takes a little while to make it completely from scratch, but it’s worth it! Also, it can be split neatly into three different stages – the meat sauce, the cheese sauce, and the lasagne construction phase. For this reason, the lasagne tutorial will be delivered in three installments.
Making lasagne in stages is good because it means that you can make twice as much meat sauce as you need, and use half for the lasagne, and half for a different meal, like spaghetti bolognese or chilli con carne. You could even freeze it for a different day!
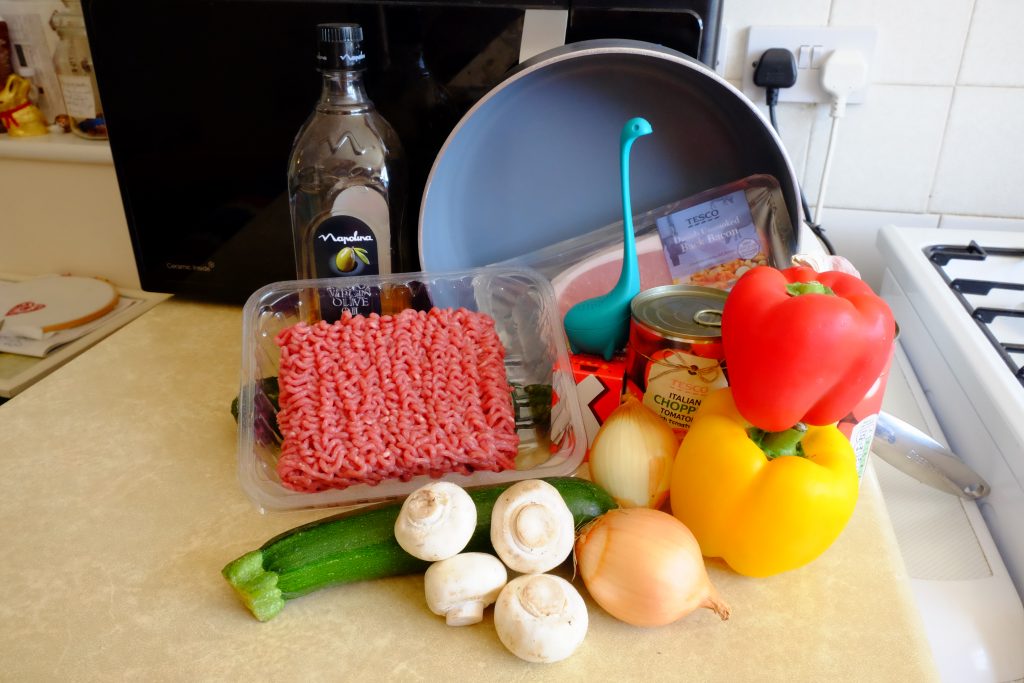
Here, Nessie has collected most of the ingredients he needs to make the bolognese. There are a couple of things which are not in this picture because he forgot to get them out of the cupboard. Silly Nessie!
For a basic bolognese sauce (which will serve 4-6), you will need:
- 2 onions
- a couple of cloves of garlic
- 500g beef mince (or veggie alternative, like Quorn)
- About 6 mushrooms
- 2-3 cans chopped tomatoes
- some oil
- tomato purée
- 2 beef stock cubes
- oregano
There are a few other things you can add to personalise your bolognese to taste. Adding 4 rashers of bacon (or some bacon lardons) makes it super tasty and increases the depth of the meatiness.
Nessie really likes vegetables, so he decided to add literally a metric ton quite a lot to his sauce. Nessie’s vegetables of choice are peppers and courgettes (two of each), but other vegetables like aubergine would also be tasty. If you want your sauce to be more meaty and less vegetabley, just add slightly fewer vegetables.
Nessie is going to chop his ingredients up as he goes along, because he is a hardcore cook who likes to show off. If you aren’t quite as confident, or tend to chop slowly, you might find it less stressful to cut up all the vegetables and stuff before you start cooking.
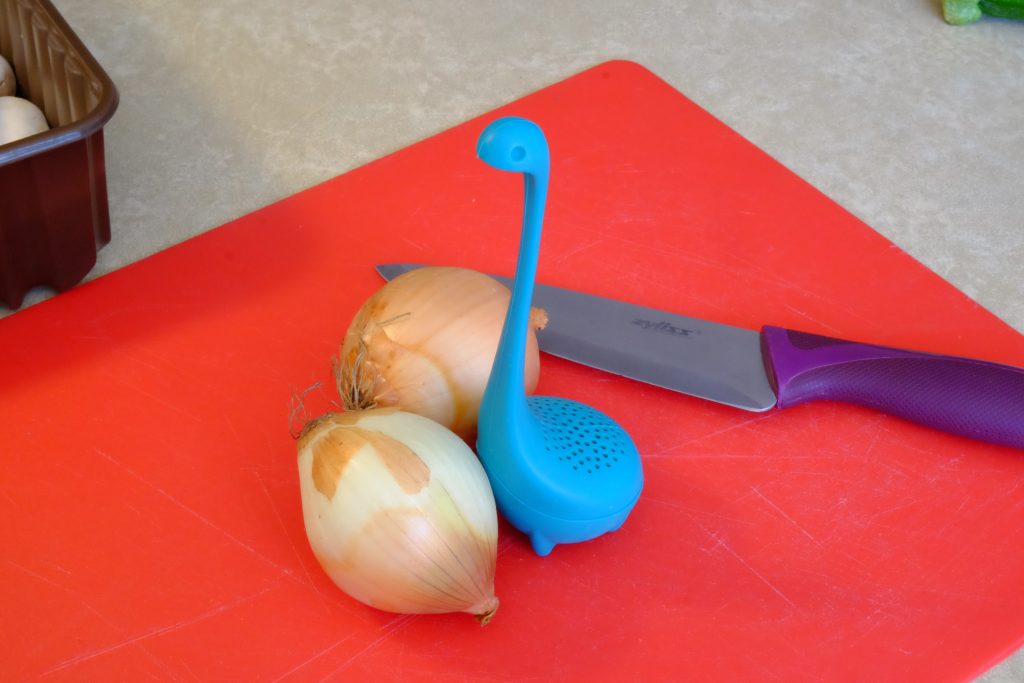
The first thing to do is peel your onions. The easiest way to do this is to cut off the top and bottom of the onion, and then peel off the papery layers.
Remember to use your favourite purple knife for best results and minimum explosive accidents.
The onions will probably not explode at this point, even if you don’t use a purple knife.
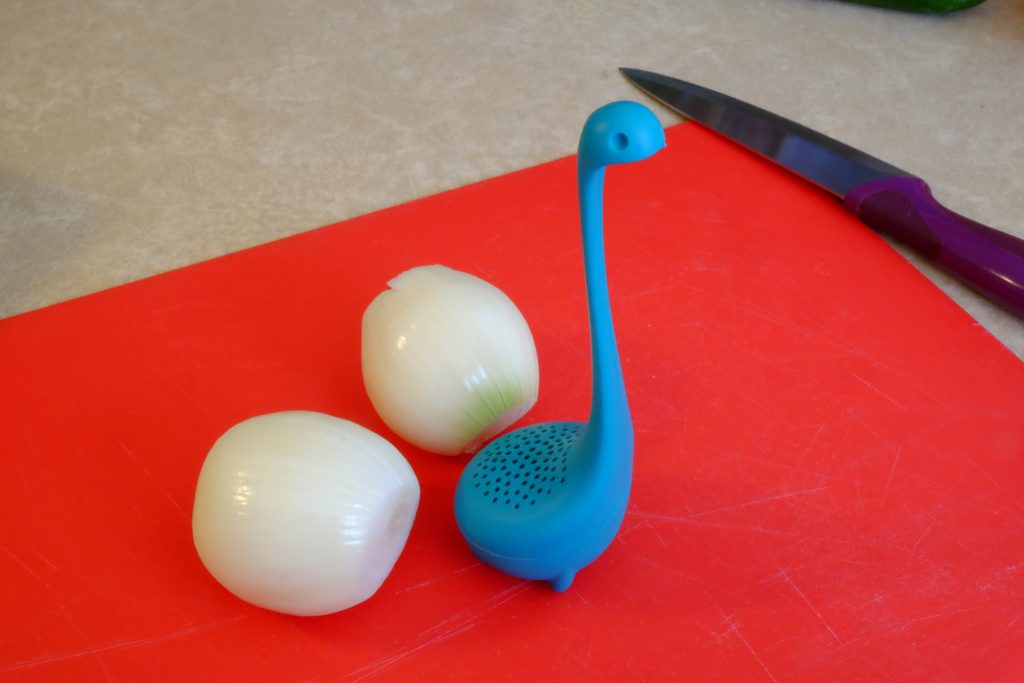
Excellent work, now you have two peeled onions (and no explosions!)
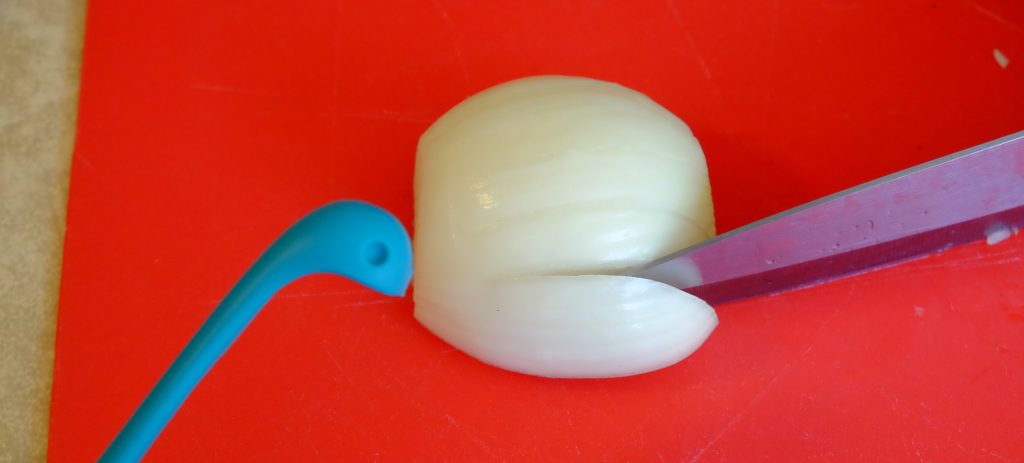
The quickest and easiest way to chop an onion is to cut it in half from top to bottom, and then put it cut side down on the chopping board. Then, use your purple knife to make evenly spaced cuts perpendicular to the root (bottom) of the onion. Make sure not to cut all the way through the root, so the onion doesn’t fall apart.
The next step is to make evenly spaced cuts parallel to the root, so you end up with little chunks of onion. When you’ve done this, you should end up with a pile of chunks and a bit of the bottom of the onion that hasn’t been cut up yet.
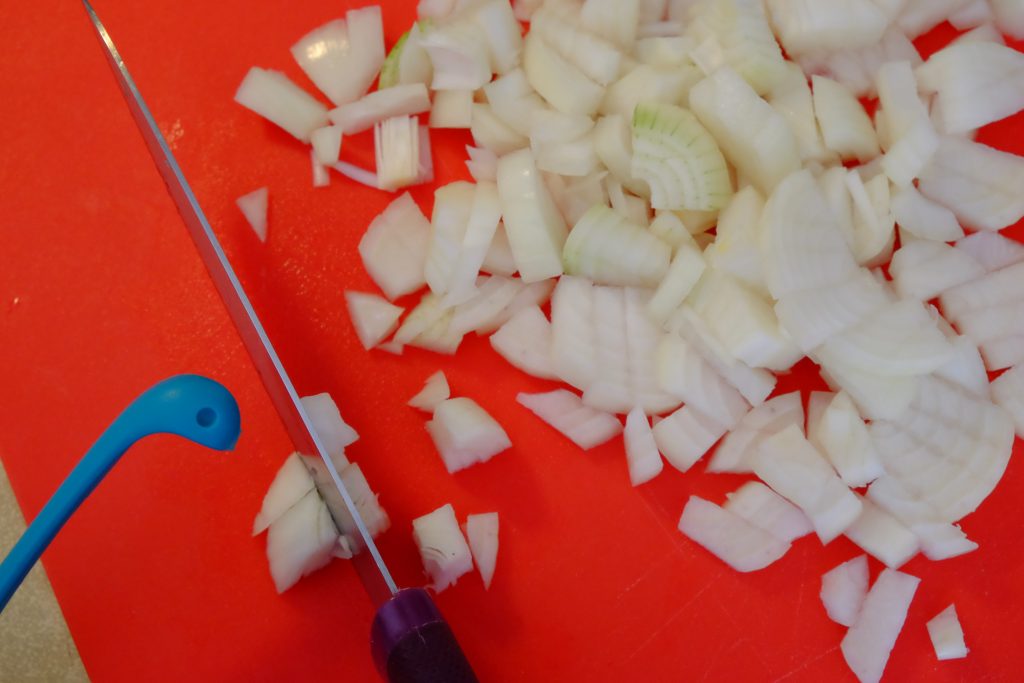
Then, turn the root bit so it’s flatter on the board and chunk that too!
(Hopefully this onion chopping explanation was easy to follow. It would probably be improved if there were diagrams, but Nessie can’t draw very well.)
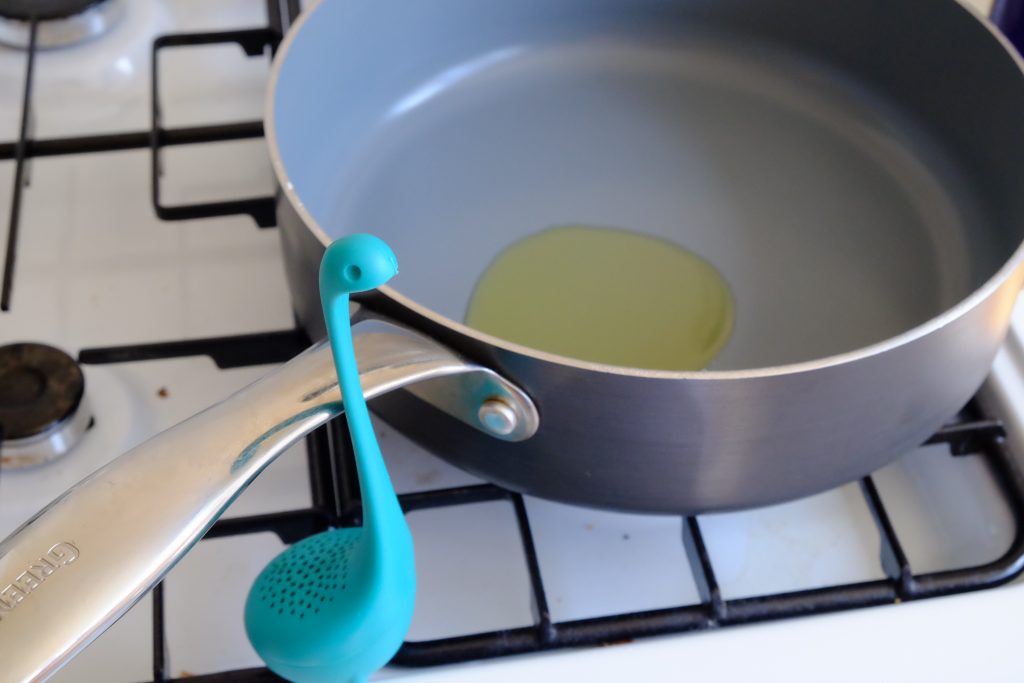
Now, heat up some oil in a pan. It’s useful if the pan is non stick, but not essential. The pan has to be quite big to fit everything in and be able to stir. If you happen to have a casserole dish kind of thing that is hob safe, you might want to use that.
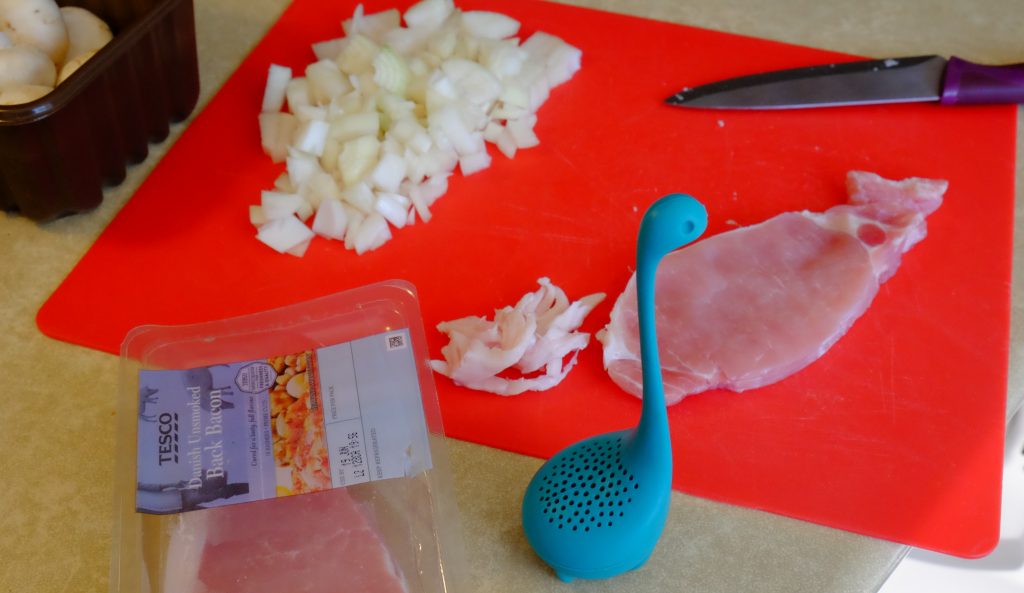
While the oil is heating, you might like to take this chance to cut up your bacon into chunks. Of course, if your bacon is lardon-shaped instead of rasher-shaped, you can skip this step. You can use a knife or a pair of scissors to cut your bacon, whichever you find easiest.
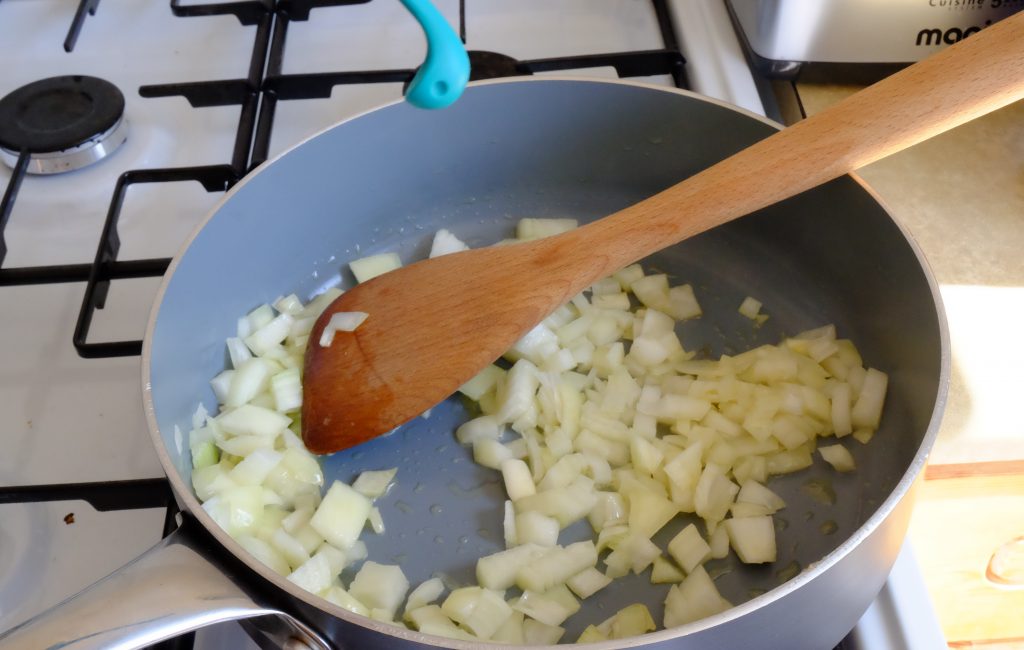
Put the onion into your heated pan, and stir to coat it with the oil. Fry it for a few minutes, until it becomes soft and golden.

Finish chopping the bacon while the onion has a party in the frying pan.
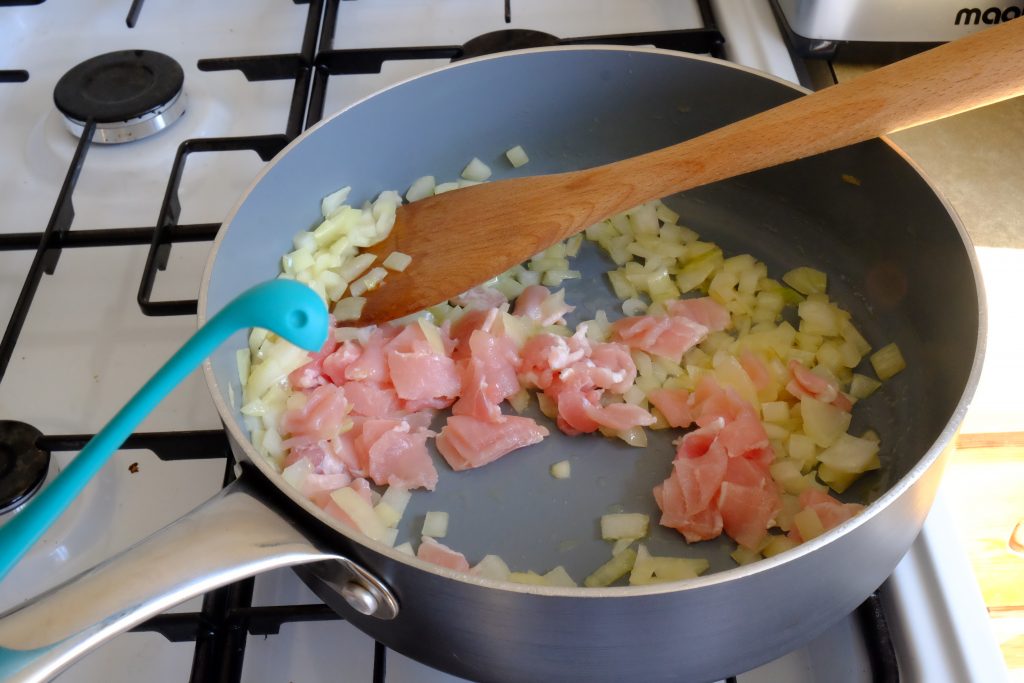
When the onion has started to change colour, add the bacon to the pan and stir.
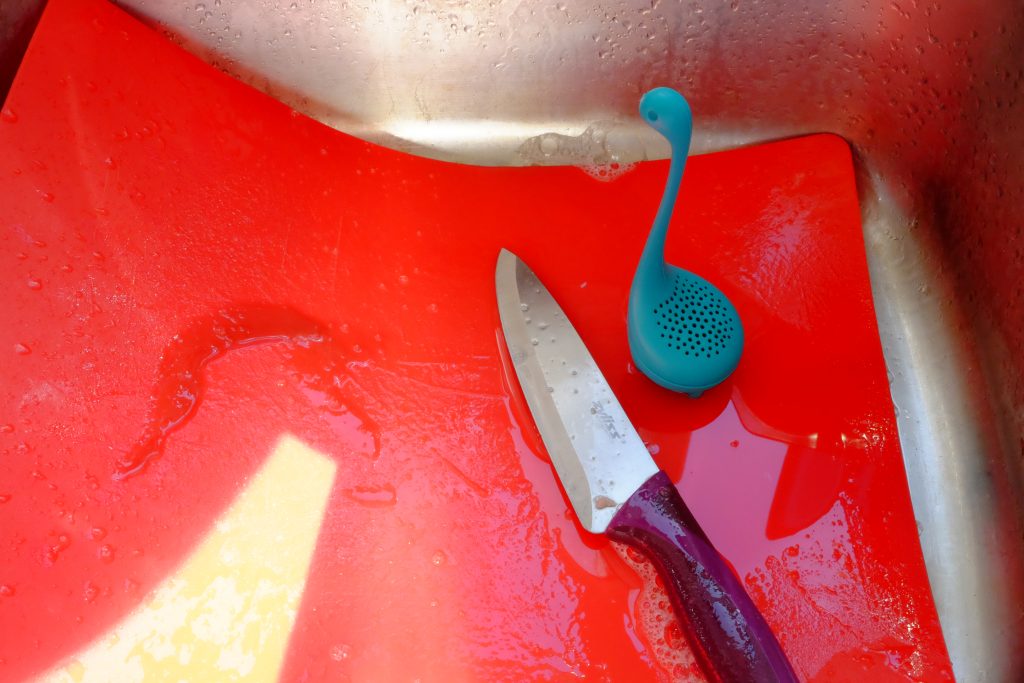
Important: thoroughly wash everything that has touched the raw bacon (except for your stirring stick, you don’t need to wash that) with washing up liquid and hot water to prevent cross-contamination and food poisoning.
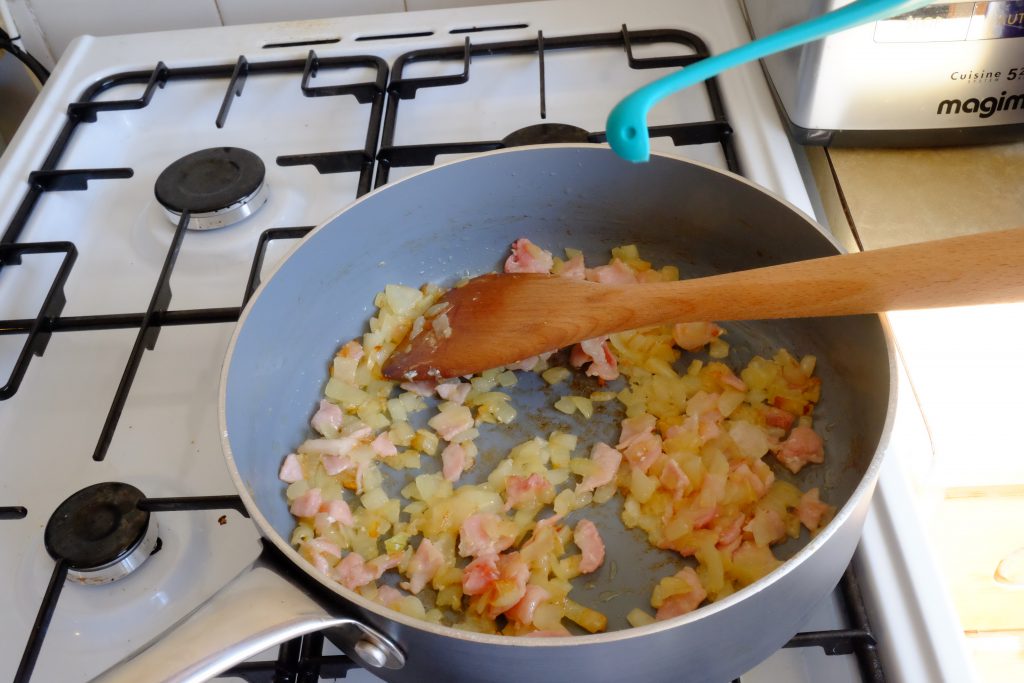
Keep an eye on the onion and bacon, and stir it around the pan a bit. You want it to look cooked and golden.
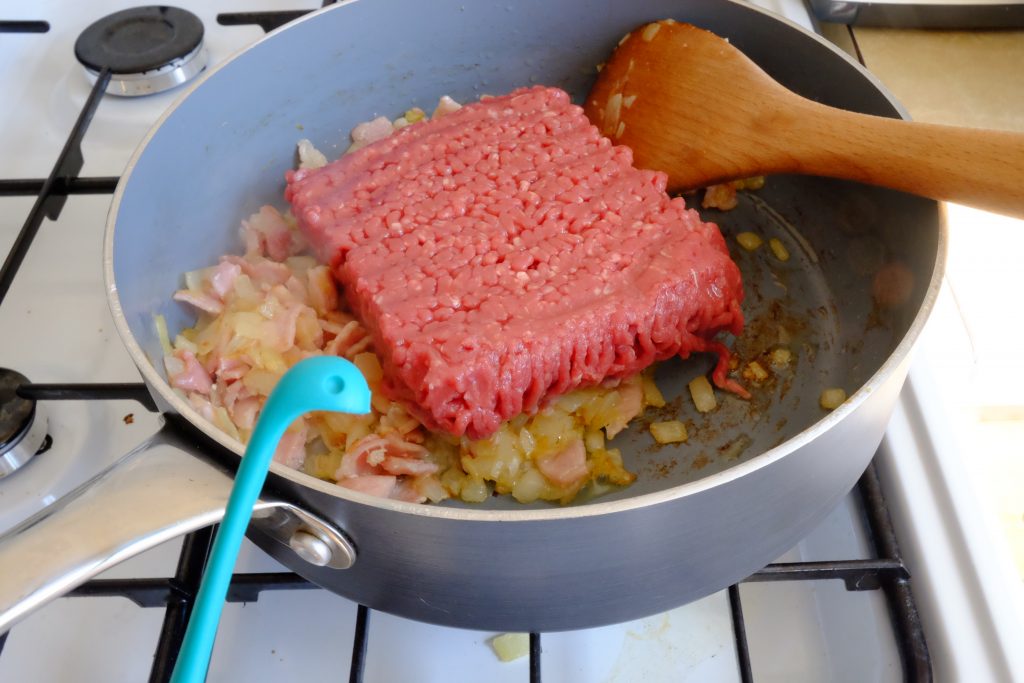
When goldenness has been achieved, add the minced beef to the pan.
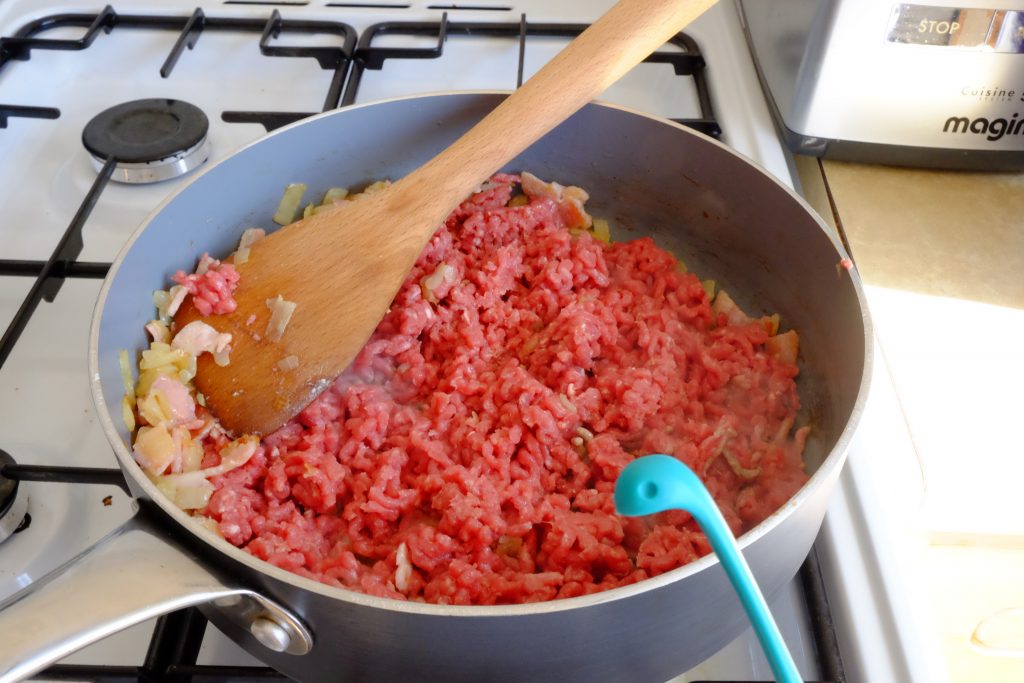
Mush up the minced beef with your stirring stick, so you don’t get large lumps of meat in your finished sauce.

Next, grab your garlic cloves and a garlic press. If you don’t have a garlic press, you can chop the garlic up by hand, but it takes a while and makes your fingers smell all garlicky.
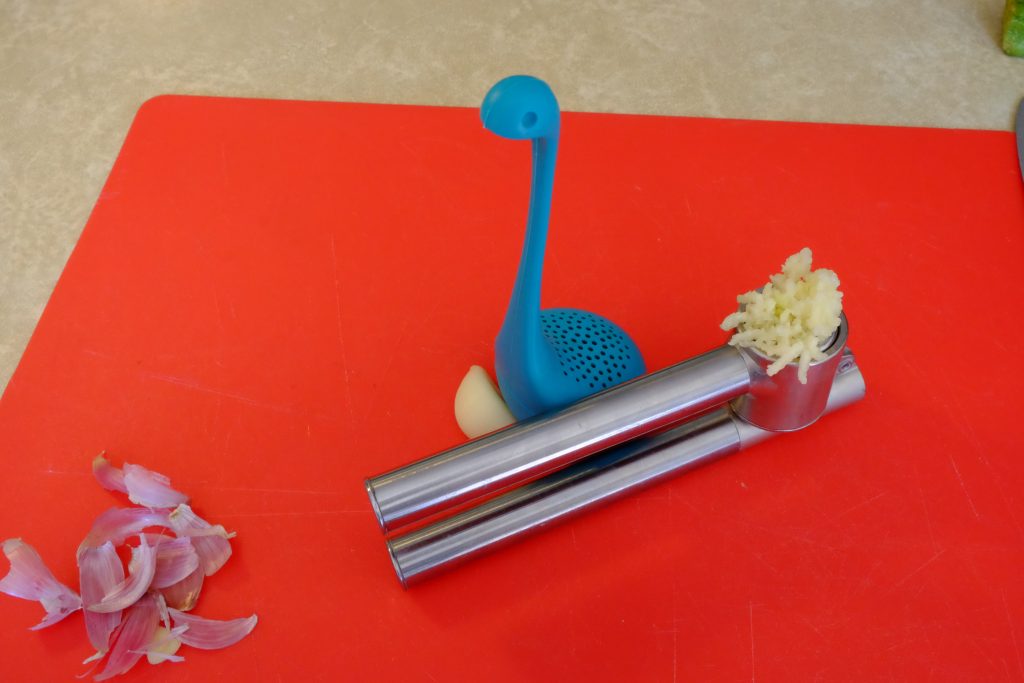
Peel the garlic cloves, chop off the hard bottom bit, and mince!
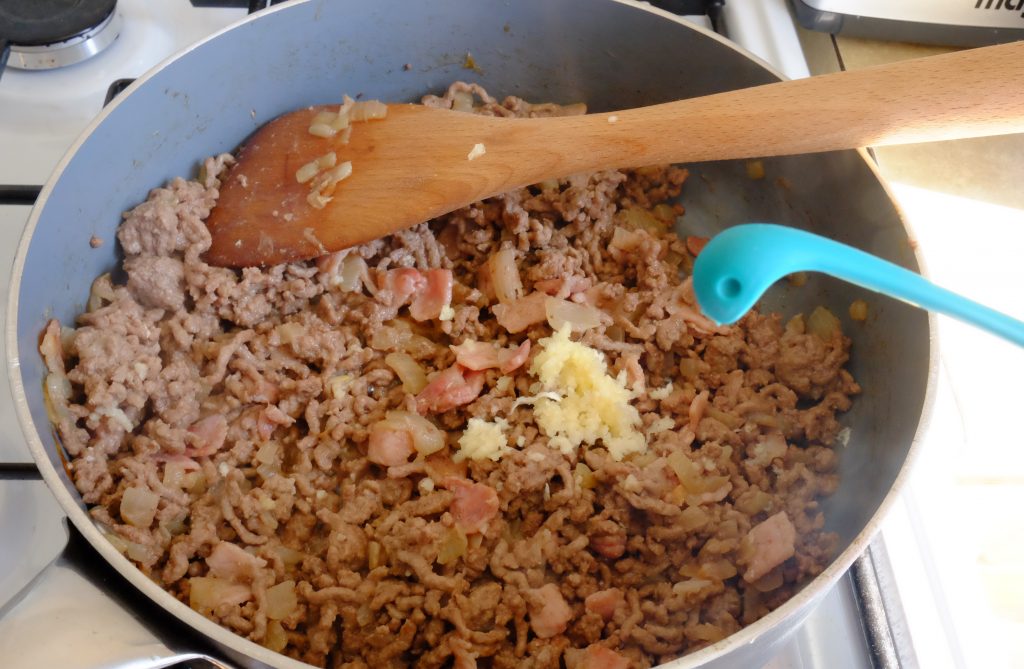
Put the garlic in with the meat in the pan, and stir.
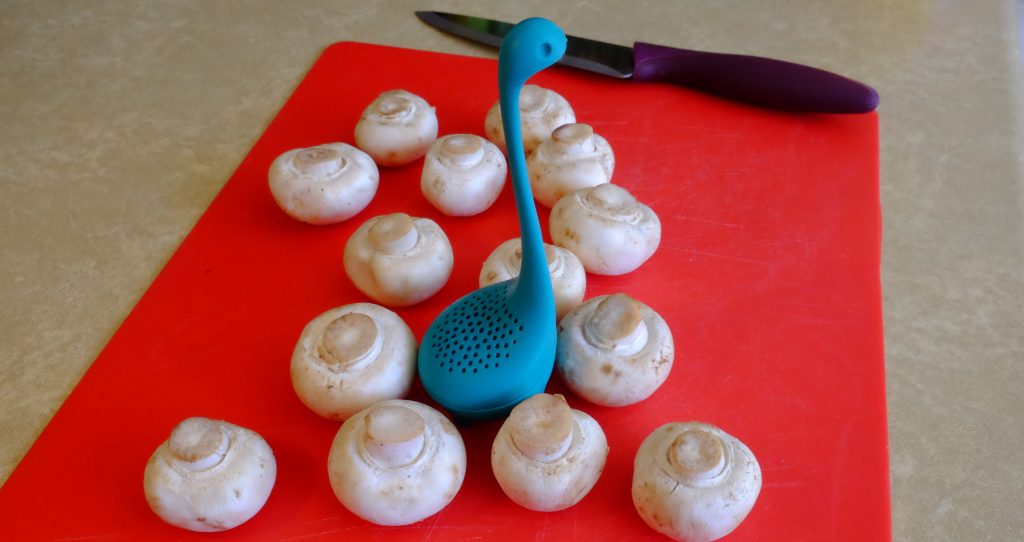
It’s vegetable chopping time! (Unless you’ve done it already).
Nessie likes to do mushrooms first, then peppers, then courgettes. This is an entirely arbitrary order, and you don’t have to follow it. However, Nessie has come up with a helpful mnemonic, in case you want to remember the order he uses: Maximum Purple Caterpillars.
Using this mnemonic, you can easily recall the utterly random order that Nessie used to chop his vegetables.
Looking at this photo, you might question why Nessie has so many mushrooms, when he recommended that you use about six mushrooms at the beginning of the recipe. This is simply because Nessie’s mushrooms are quite small, he likes mushrooms, and this is the number of mushrooms that Nessie had at the time. Mushrooms.
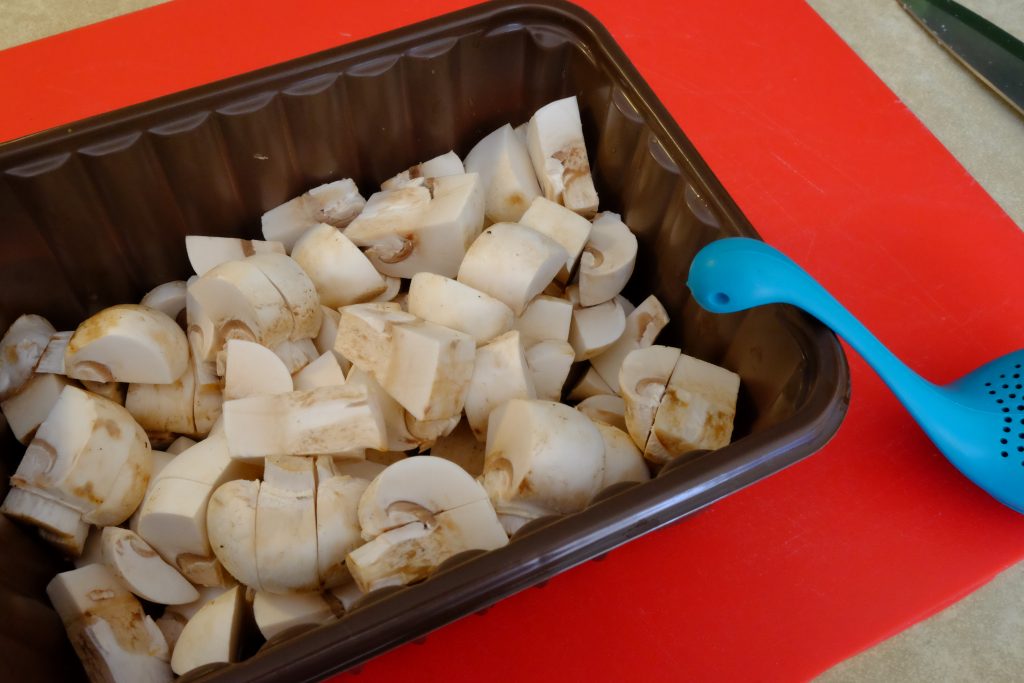
If you have chopped your mushrooms at the beginning of the recipe, you might find it helpful to put the chopped mushrooms back into the mushroom punnet for safekeeping.
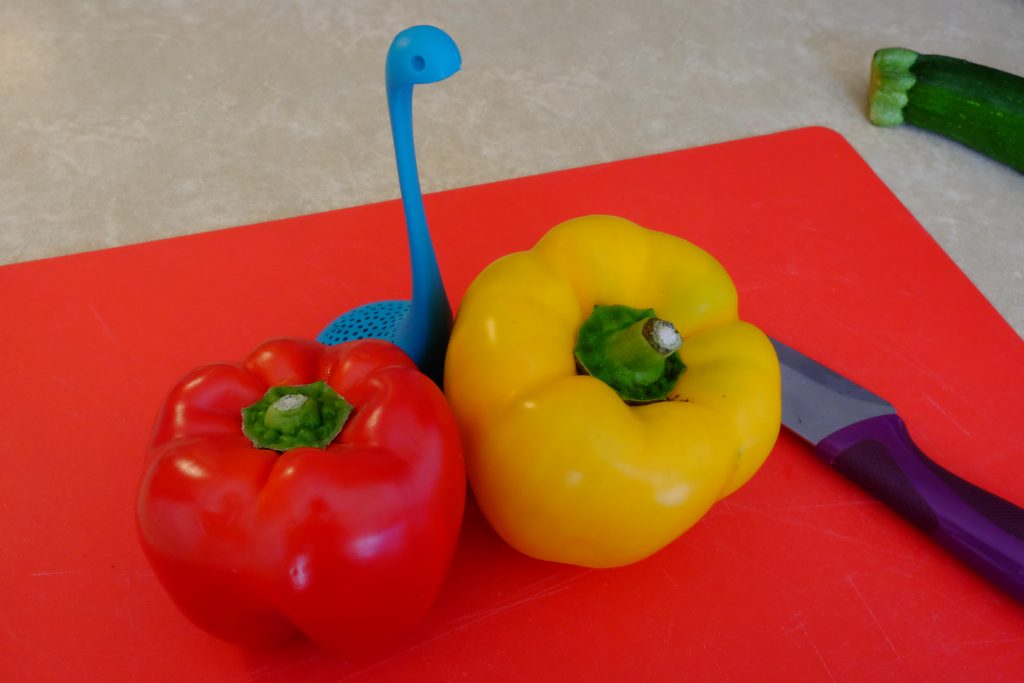
Peppers! It’s good to put peppers in bolognese sauce because they are tasty and also colourful, so they make it look a lot prettier.
Nessie is now going to attempt to explain a good way to chop peppers without getting seeds everywhere, again without diagrams because he can’t draw. If you look at your pepper, you should notice grooves going up the sides and towards the green stem bit. Cut down along the grooves.
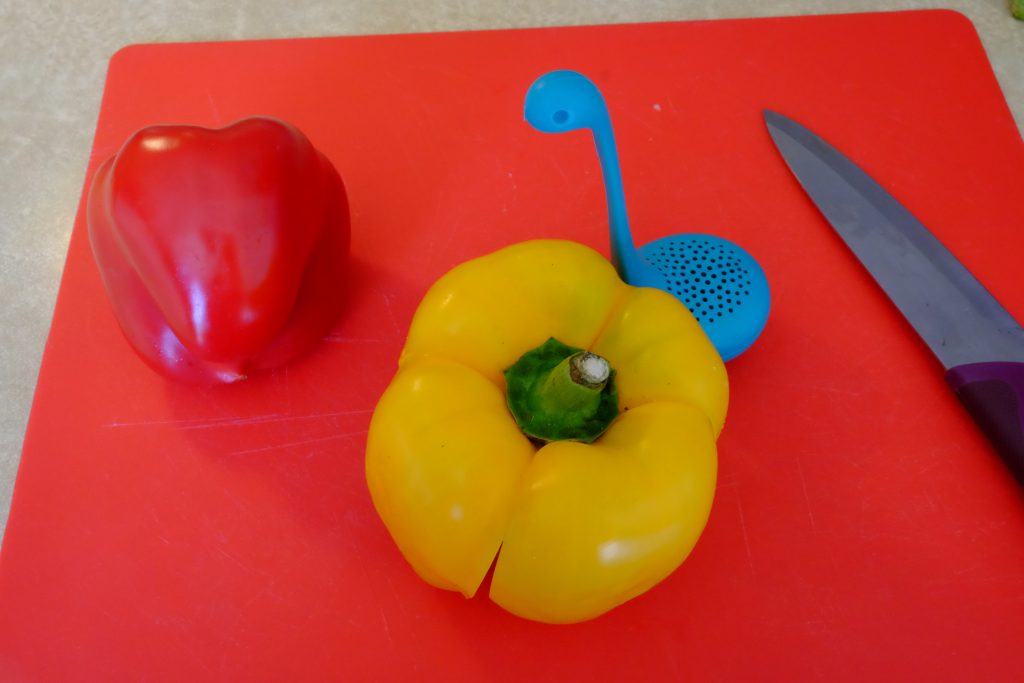
If you turn the pepper over, you should see that the pepper is now split into sections, but still held together at the top by the stem. Carefully pull each section away from the pepper, breaking it off at the stem.
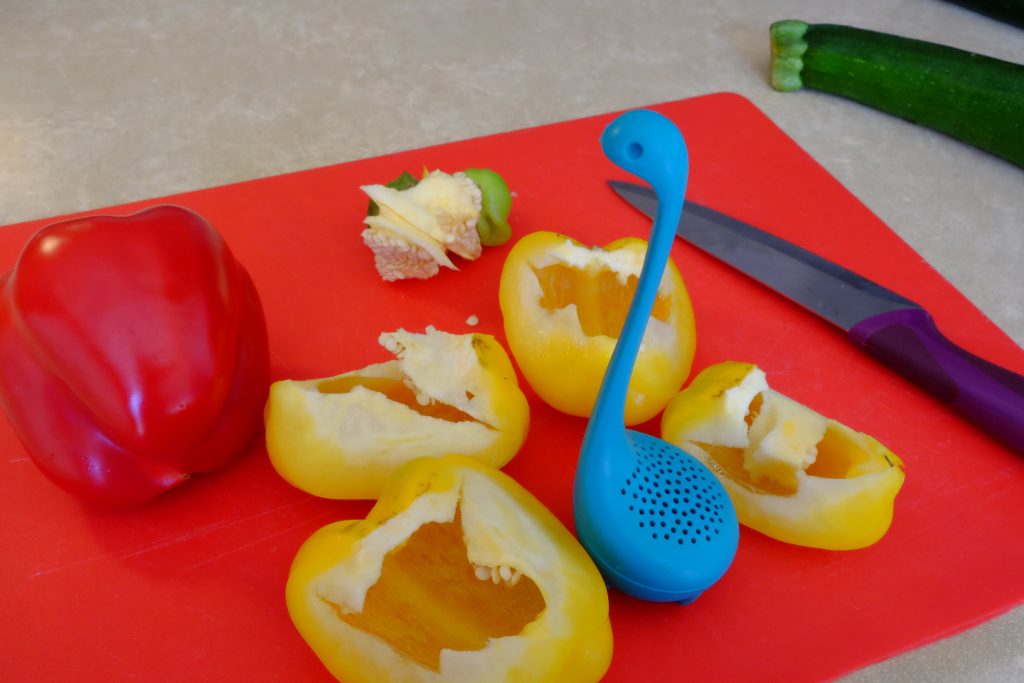
If the pepper has co-operated, you should find that you now have separated outer sections of the pepper, and most of the seeds are still attached to the stem. Sometimes the pepper refuses to co-operate. Do not let this reflect badly on you; it is entirely the pepper’s fault, and you are not to blame.
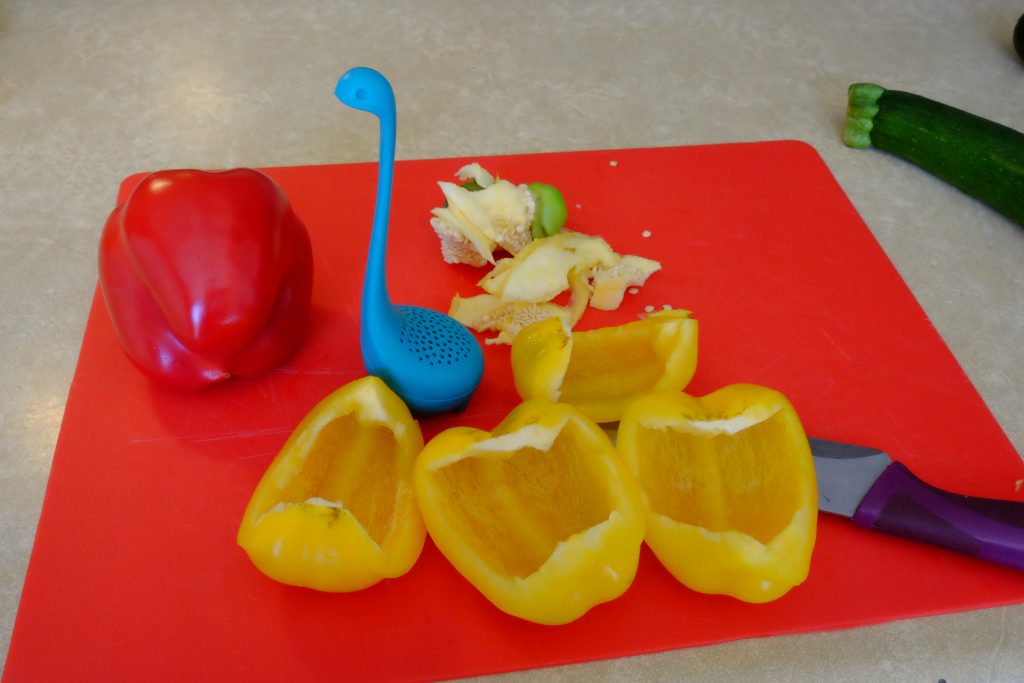
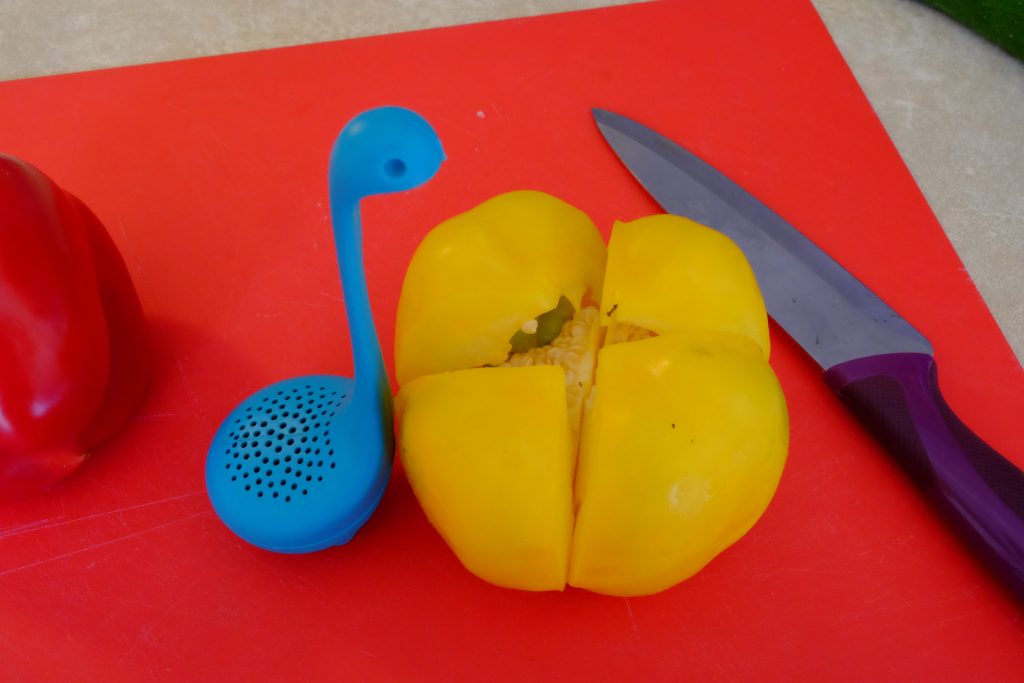
Using your knife, cut out the whitish bits of flesh and clean out the seeds. You don’t want the white bits in your bolognese, because they are weirdly textured, and tend to be bitter.
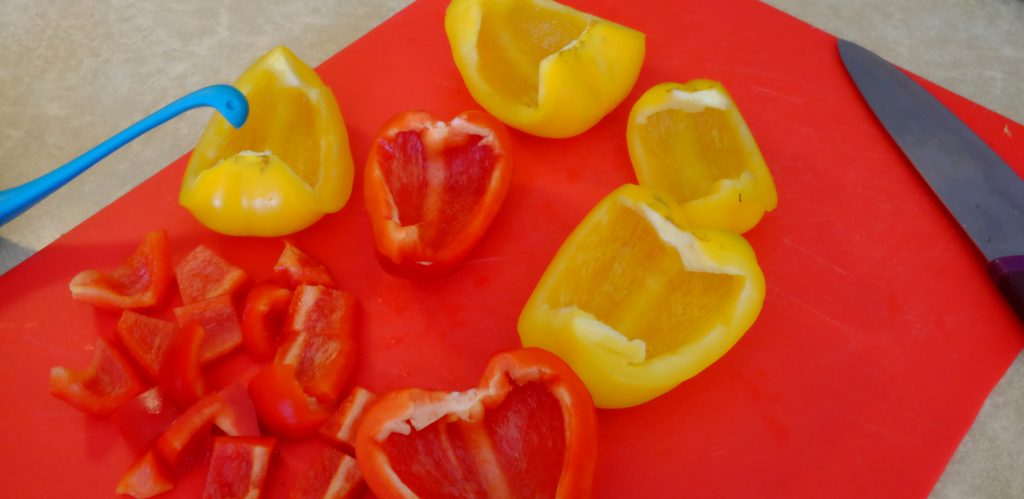
Then, chop up your pepper into squarish chunks – it doesn’t have to be exact.
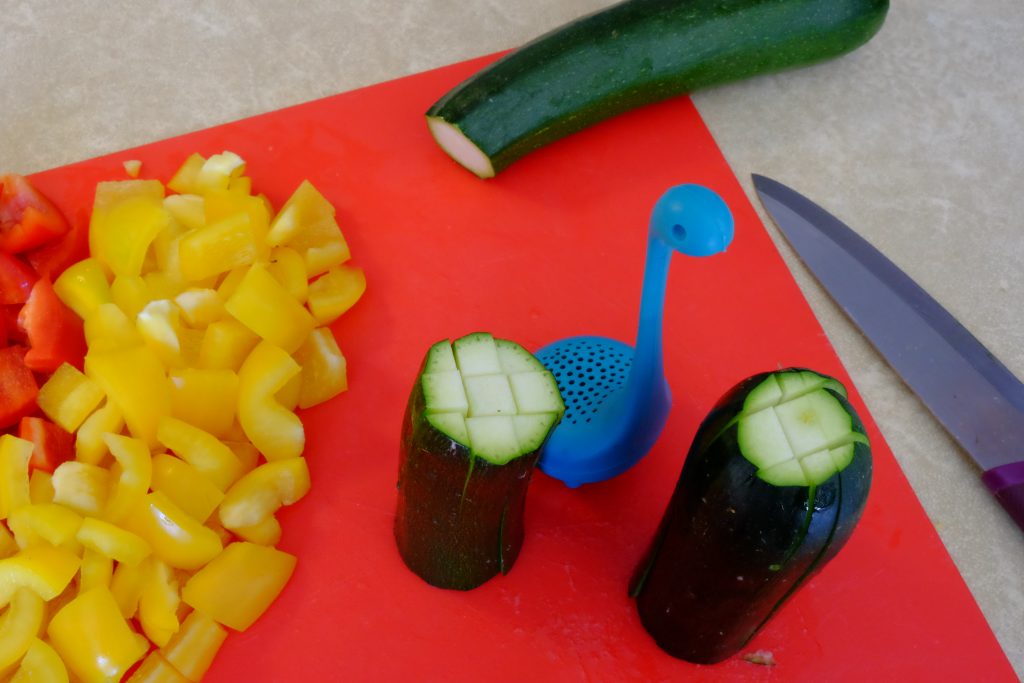
To chop the courgettes, Nessie recommends cutting them into two or three sections, then standing them up on the chopping boards and cutting a grid down through the length of the courgette.
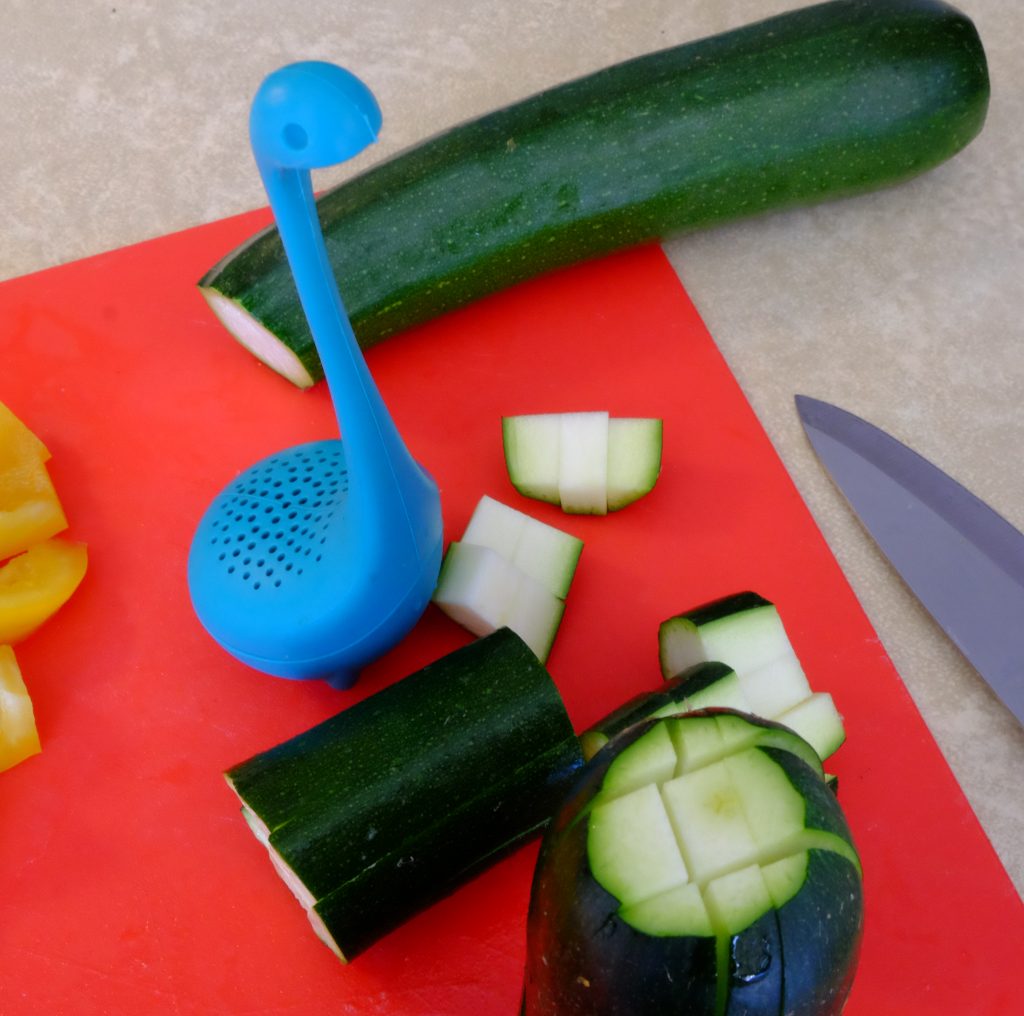
You can then turn the courgette horizontally and chop along it, quickly and easily making small cubes of courgette.
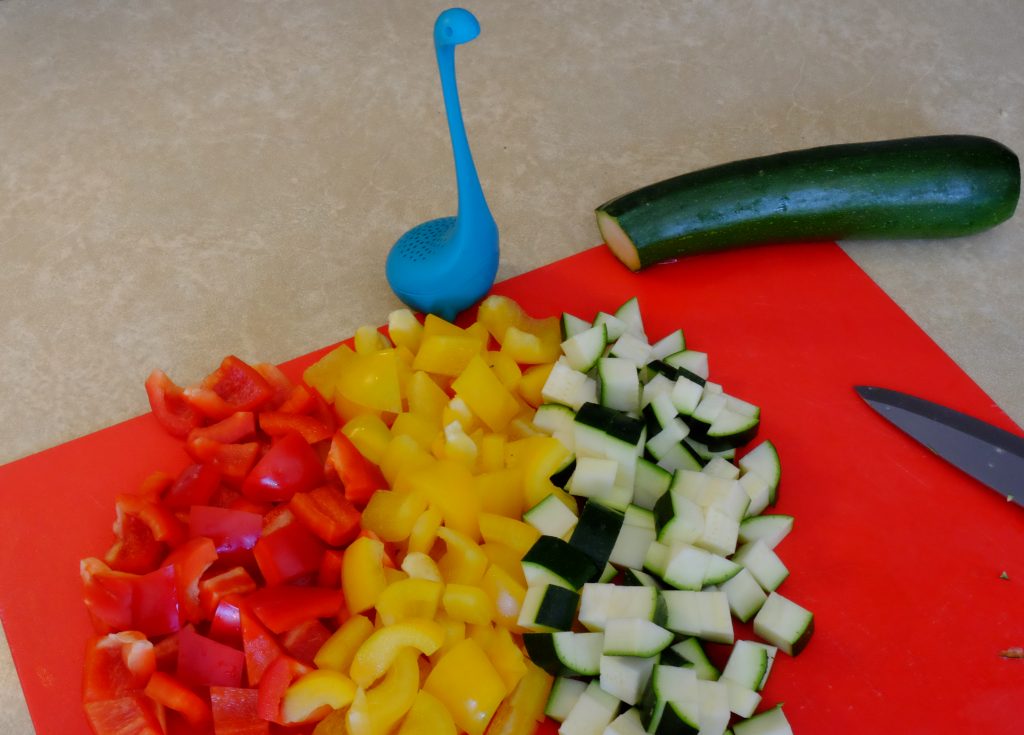
If you happen to have cut a red pepper, a yellow pepper, and a courgette on the same chopping board, you can take this opportunity to recreate the flag of Guinea out of vegetables. This is especially useful if you happen to be from Guinea, and feel a strong urge to be patriotic right now.
With a little creative rearranging, you can also produce the flag of Benin, thus showing off your knowledge of flags of the world. The possibilities are almost endless, although a colour palette consisting only of red, green, and yellow limits you to mostly African countries. If anyone manages to make the Grenada flag out of vegetables, Nessie will be very impressed.
Further vegetable flag adventures may necessitate the invention of a blue vegetable.
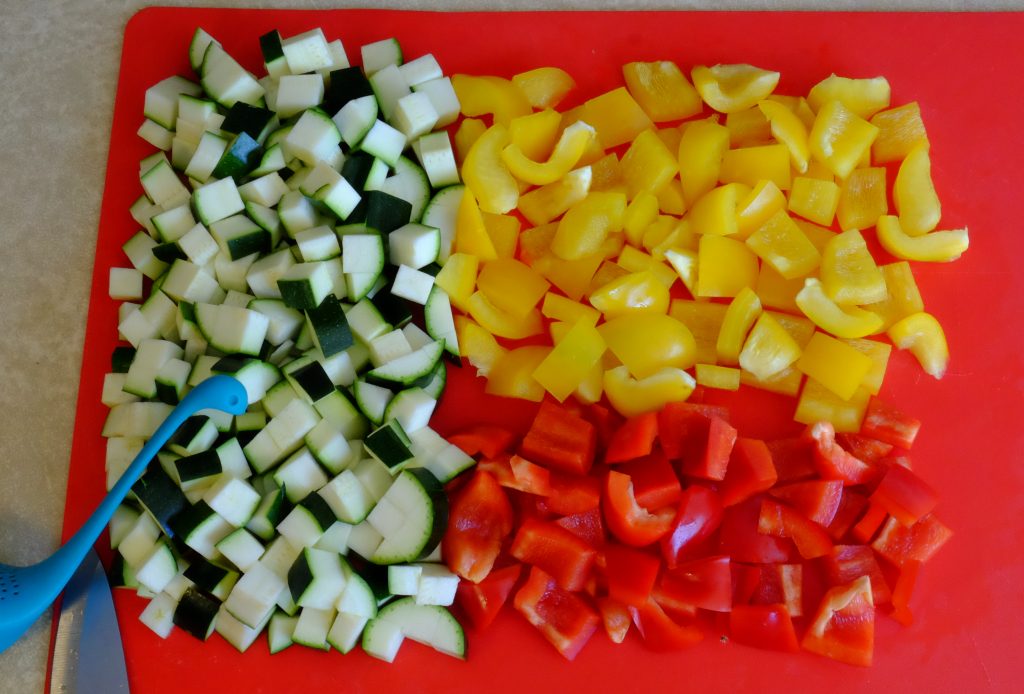
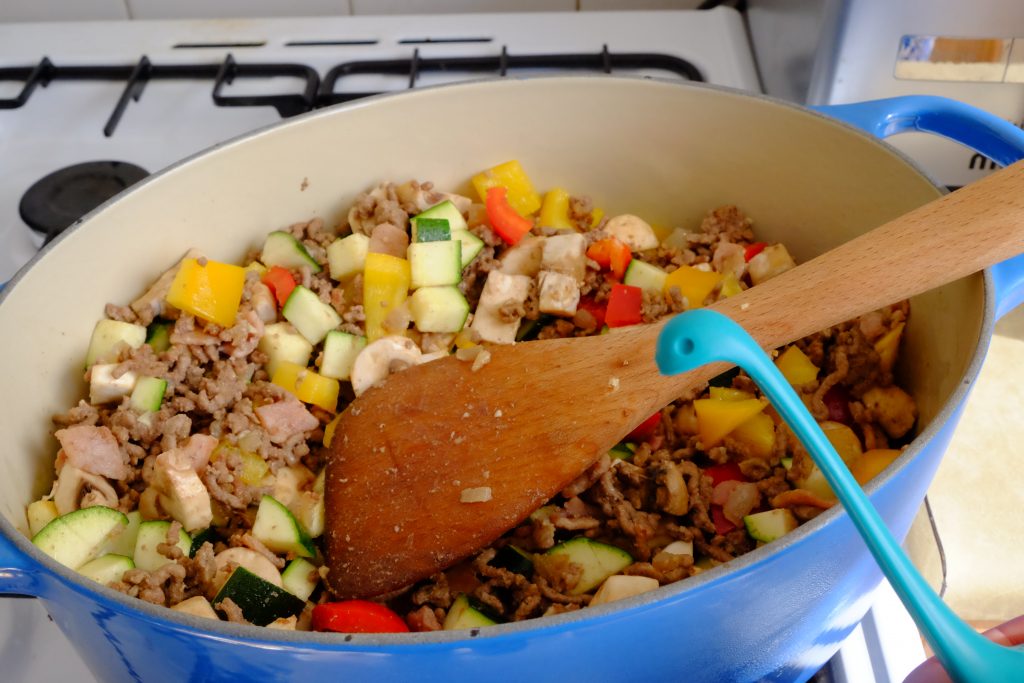
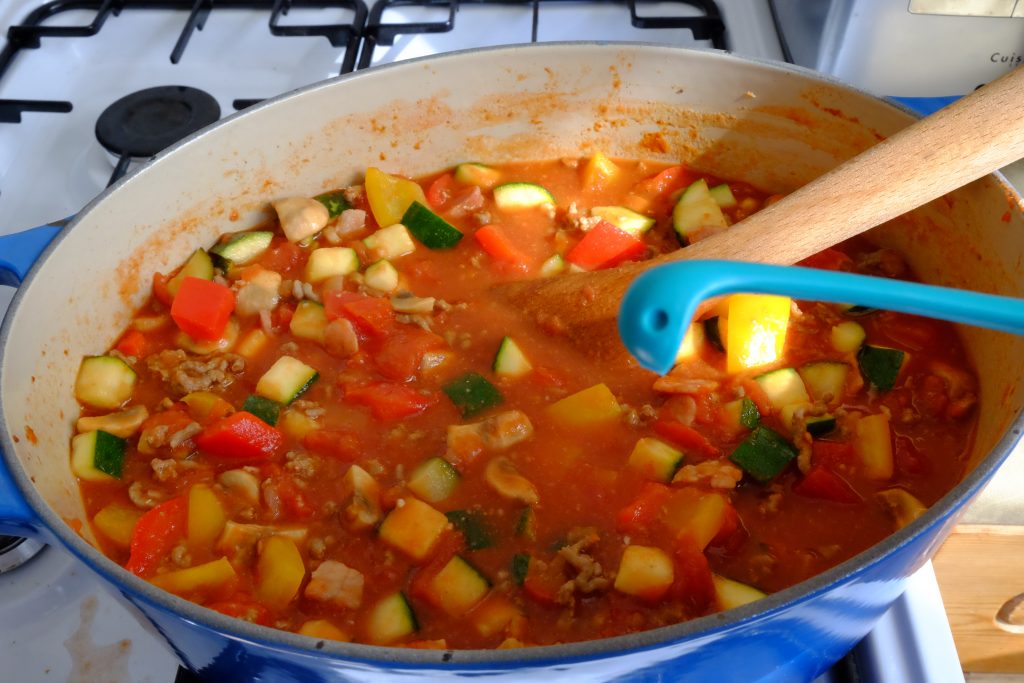
When all your vegetables have been chopped to your satisfaction, add them to the pan. If you left the stove on while you were messing around making vegetable flags, you may find that the meat has burnt slightly. Luckily, Nessie turned off the stove before embarking on his artistic vegetable arranging. If you turned off the stove, turn it on again now.
When you have added the vegetables to the pan, take this opportunity to do a vegetable based fashion shoot. On no account should you get into the pan. This is unsafe and irresponsible behaviour. Do not do this at home.
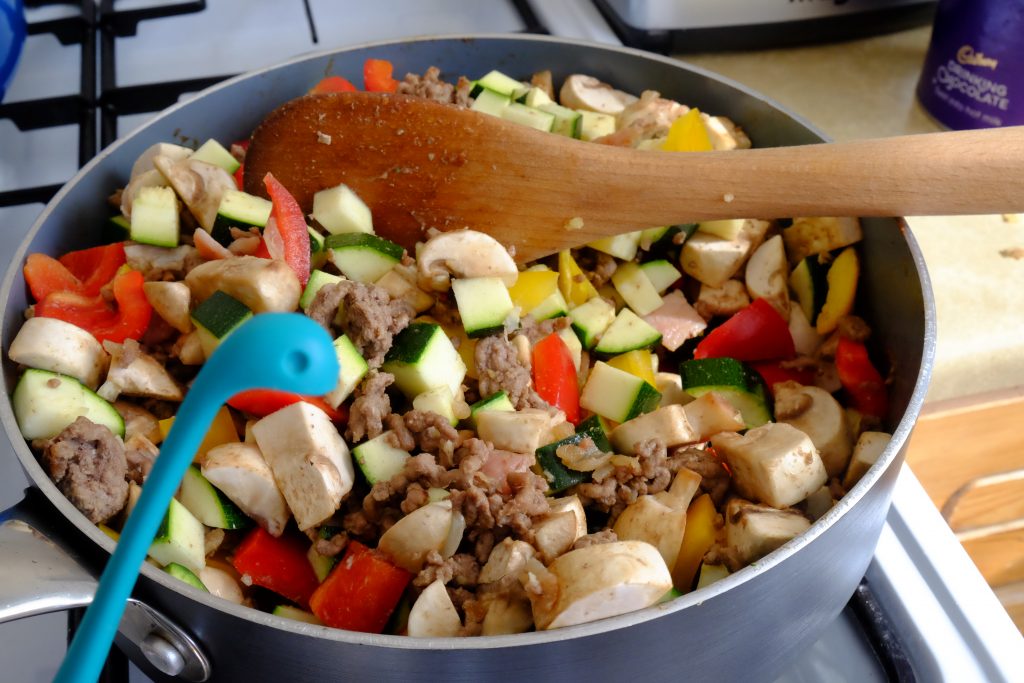
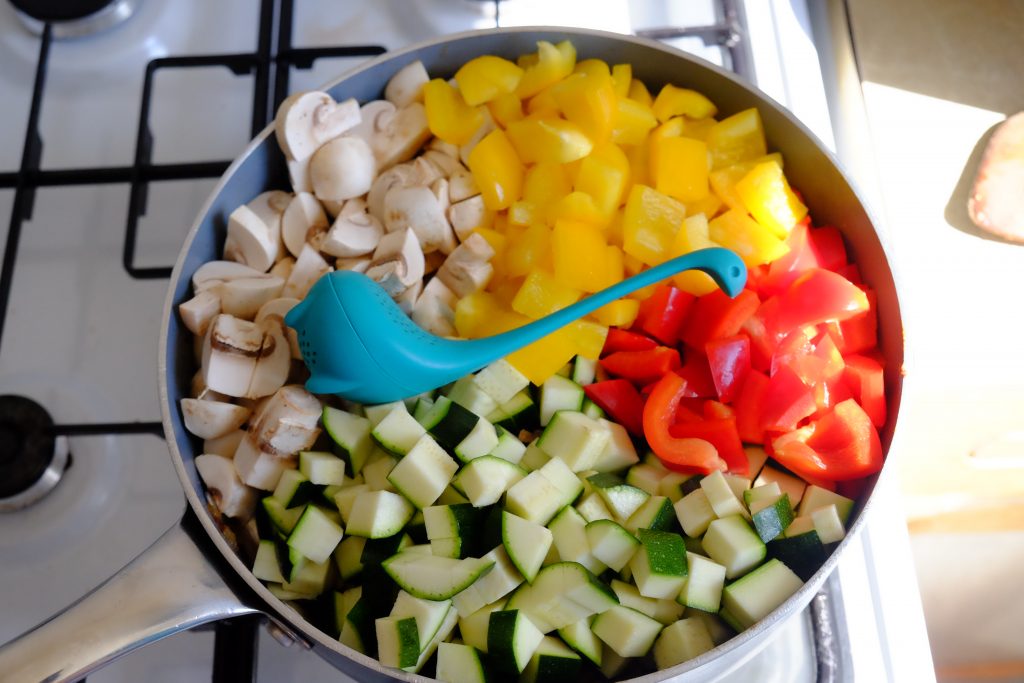
Stir the vegetables in, so they can cook evenly. At this point you may find that your pan is too small because you got too excited about vegetables. If this is the case, just close your eyes, chant the magic words; “Maximum Purple Caterpillars”, and…..
*poof!*
… your bolognese is now in a different pan. Magic!

While your sauce is simmering away cooking them tasty tasty vegetables, assemble the supplies needed to finish off your sauce extravaganza.
You’ll need two or three tins of chopped tomatoes, a couple of beef stock cubes, some tomato purée and some oregano.
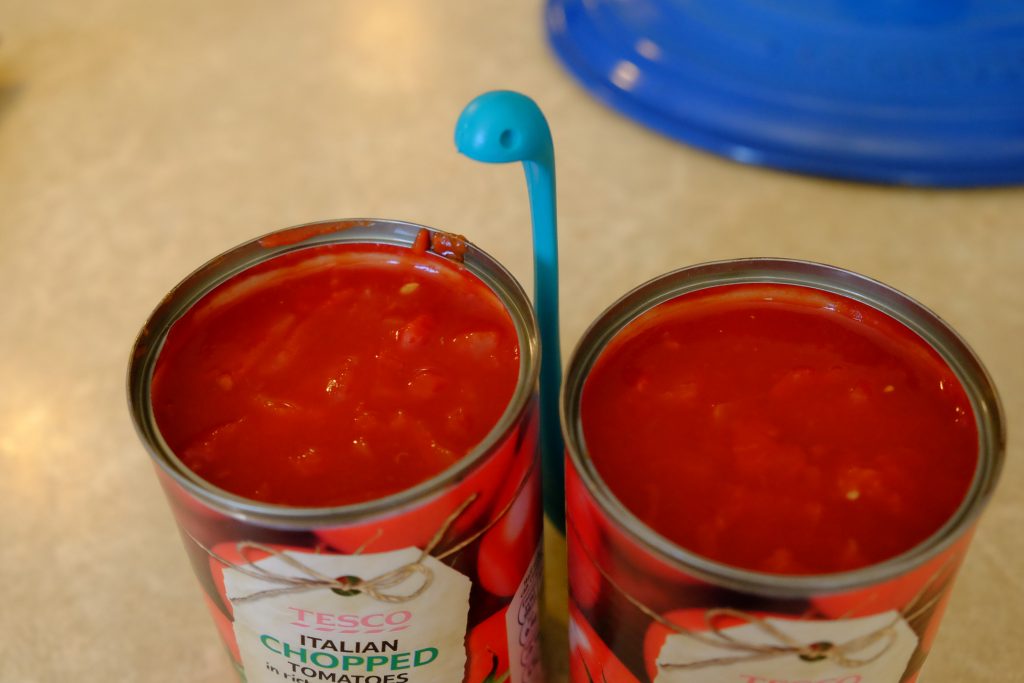
You should open the tins of tomatoes before adding them to the pan.
Nessie actually used three tins of tomatoes to make this sauce, but you can only see two here due to the fact that the third can was still in the shop when this photo was taken.
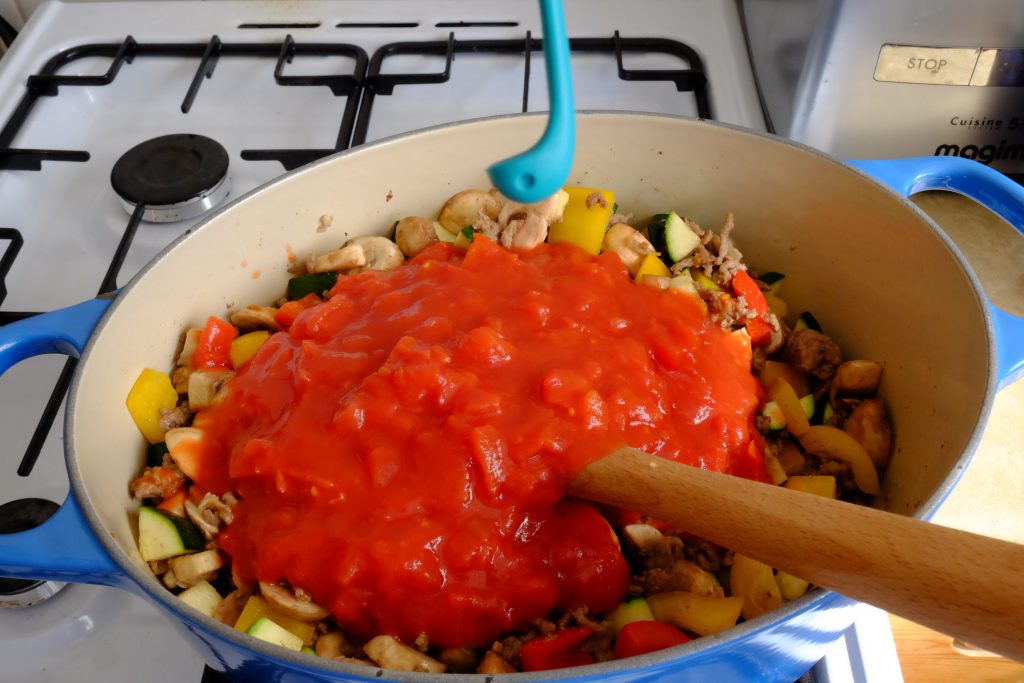
Pile the tomatoes on top! And then stir them in.
Judge your sauce to see if it is appropriately saucy. If it seems too dry, add another tin of tomatoes. If there seems to be too much sauce, it’s okay. The excess water will be boiled off later.
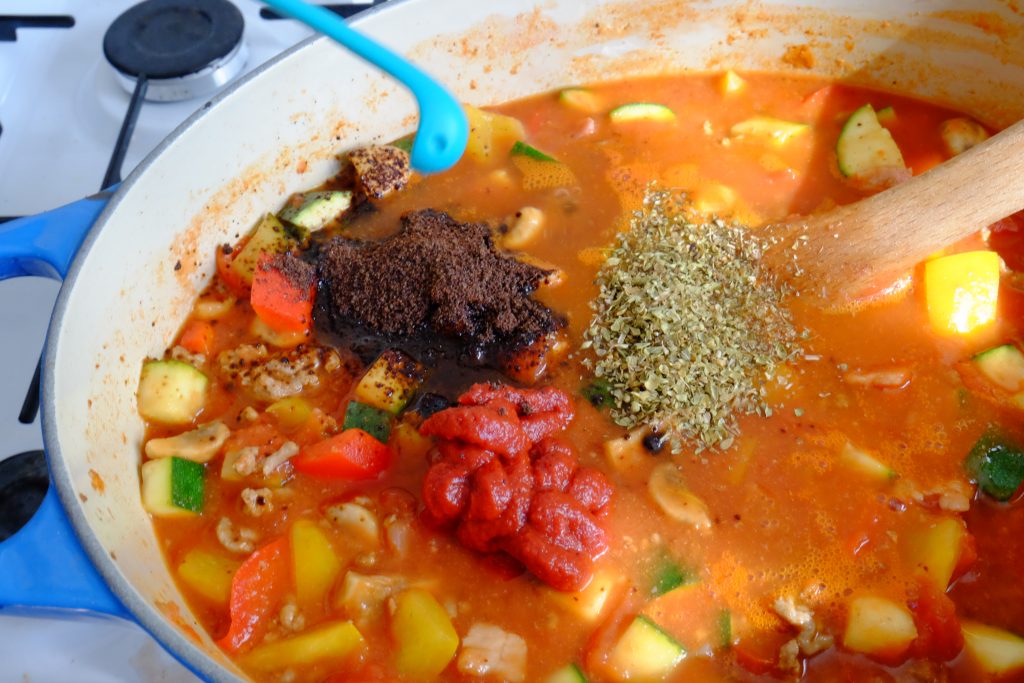
Add tomato purée, oregano, and beef stock cubes, then stir.
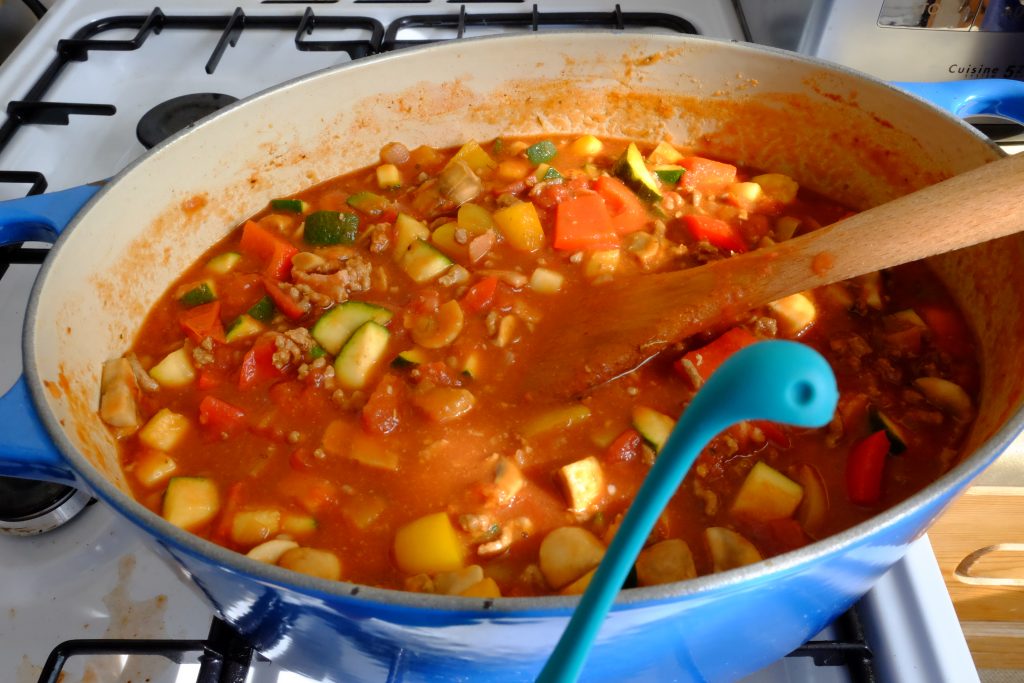
Feel proud of yourself for all that you’ve achieved.
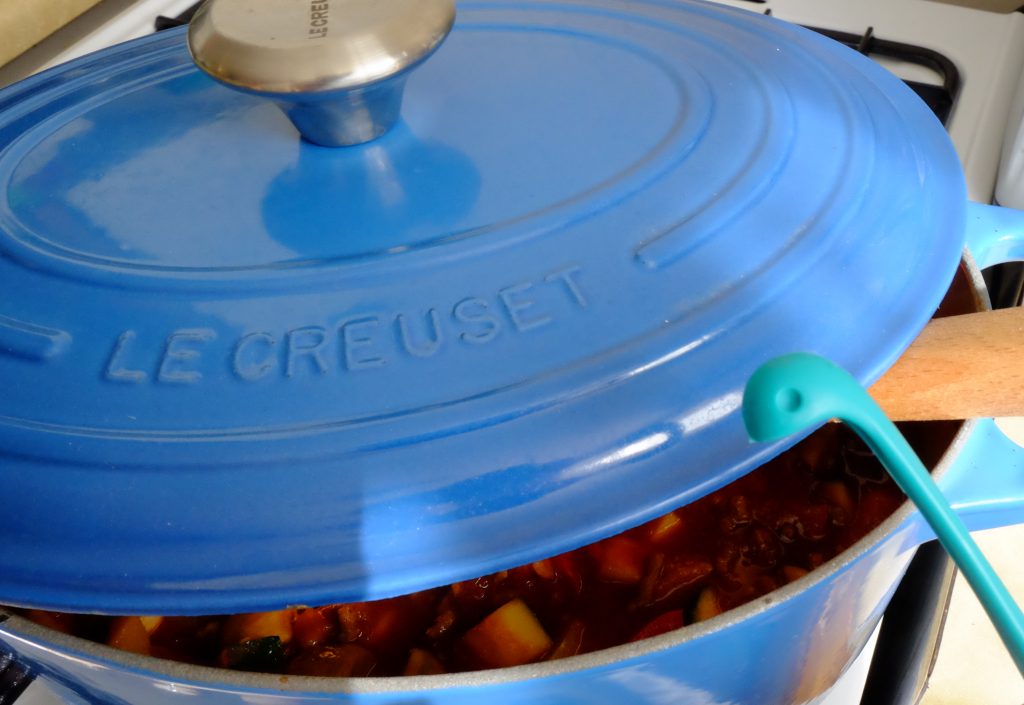
Put a lid on your pan (but leave the stirring stick in), and then simmer for a while. It’s good to leave it for at least half an hour, but it can be done in twenty minutes in a pinch. The longer you simmer it for, the better the flavours will develop. An hour is good.
Occasionally check on it and give it a stir to stop it from catching and burning on the bottom. Nessie does not recommend this position for checking on the bolognese, unless you are made of silicone or are otherwise heatproof.
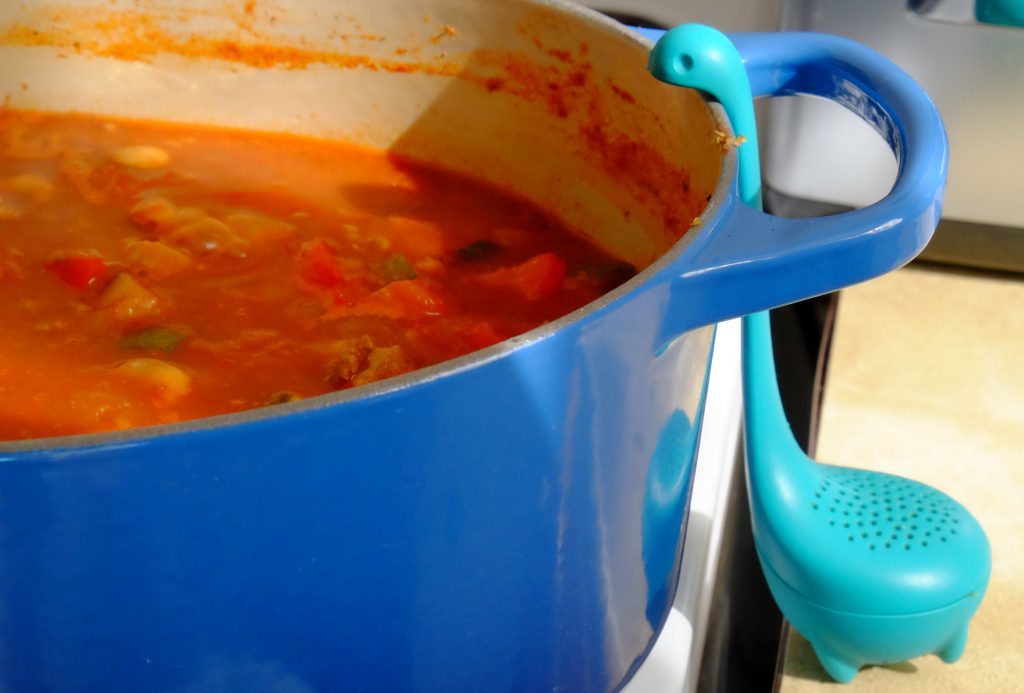
After simmering for a while, it’s finished!
You can enjoy the bolognese sauce as it is, serving it over spaghetti with grated cheese on top, or use it as a base for many other meals.
Check out the next installment for further instructions on making your bolognese into lasagne.
Other meal options include cottage pie (like shepherds pie but with beef mince instead of lamb mince) (put the bolognese in a baking dish and top with mashed potato, then bake until the top is crispy and golden), or chilli con carne (add kidney beans and chilli powder to the sauce, and then serve with cooked rice and plain yoghurt).